How to Remove Portobello Market Stains from Antique Rugs
Posted on 06/05/2026
If you've brought home a beautiful antique rug from a Portobello Market browse, or your hallway rug has picked up the sort of marks that seem to happen in a blink on a busy London weekend, you're probably wondering what to do first. The short answer: slow down, don't scrub, and treat the stain like something delicate until you know what fibre, dye, and weave you're dealing with. How to Remove Portobello Market Stains from Antique Rugs is really about protecting age, colour, and value while getting the rug genuinely clean.
Antique rugs can be surprisingly tough in some ways and incredibly fragile in others. A cleaning method that works on a modern synthetic carpet can easily distort wool, bleed vegetable dyes, or leave a watermark that is worse than the original stain. This guide walks you through safe removal methods, common pitfalls, and the point where a specialist is the wiser call. Truth be told, that point comes sooner than many people expect.
Why How to Remove Portobello Market Stains from Antique Rugs Matters
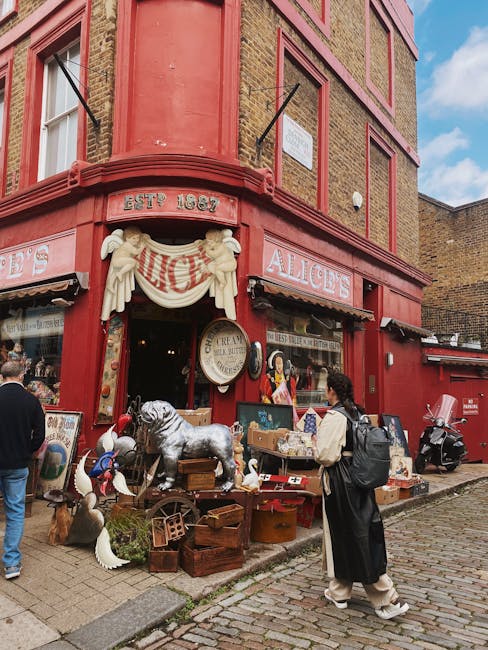
Portobello Market is brilliant for antiques, vintage finds, and a bit of accidental chaos. Mud from pavement edges, coffee spills from a grab-and-go cup, oil from food stalls, and the general wear of a lively Saturday can all end up on a rug before you've even set it properly in the room. The issue with antique rugs is not just appearance. A stain can settle into aged fibres quickly, and the wrong treatment can pull colour out of the pile, distort the backing, or leave a tide mark that announces your cleaning attempt for years.
There's also a preservation angle. Antique rugs are often hand-knotted, hand-dyed, or made with natural fibres such as wool, cotton, silk, or a mix of all three. That means no two rugs behave exactly the same. A quick shop-bought cleaner may seem harmless, but it can shift pH, strip lanolin from wool, or react with dye. If the rug has sentimental value, inherited value, or resale value, the stakes are higher.
For local readers in Notting Hill and W11, this matters because homes here often mix period interiors, heirloom pieces, and busy everyday living. A rug may sit near a front door, in a dining room, or under a side table in a flat with limited space for drying. In other words, the practical constraints are real. If you want broader local advice on maintaining carpets and textiles in the area, our Notting Hill carpet cleaning page for W10 is a useful place to start, and our Portobello Road carpet care guide for W11 covers nearby cleaning conditions in more detail.
How How to Remove Portobello Market Stains from Antique Rugs Works
The basic idea is simple: identify the stain, test the fibres, use the gentlest effective method, and remove moisture without over-wetting the rug. The tricky part is that antique rugs do not give you much margin for error. Cleaners need to work from the outside of the stain inward, use minimal liquid, and avoid rubbing, which can push soil deeper into the pile and rough up fibres.
Here's the logic behind the process:
- Dry soil first: Loose dirt or grit should be lifted before any liquid is added, because grit behaves like sandpaper.
- Spot test: A hidden area checks whether dyes run or fibres react badly.
- Target the stain type: Food stains, mud, grease, and wine each need slightly different handling.
- Control moisture: Antique rugs hate saturation. Too much water can spread staining, weaken backing, or create browning.
- Dry properly: Drying flat, with airflow, is often just as important as the cleaning itself.
The best method is usually not dramatic. No grand scrubbing, no heroic bucket of foam. Just calm, careful steps. If you've ever watched a fresh coffee mark on wool and thought, "that can't be that hard to fix," well, sometimes it can, but only if you avoid making it bigger in the first minute.
One more thing: antique rugs often have old repairs, fragile fringes, or uneven wear. A patch that looks like a stain might actually be dye variation or oxidation. That's why an experienced eye matters. The mark you see is not always the mark you think it is.
Key Benefits and Practical Advantages
Cleaning an antique rug properly gives you more than a better-looking floor covering. Done well, it helps preserve the rug's structure, keeps the colours readable, and prevents a small incident from becoming a long-term problem.
- Protects value: Good cleaning preserves the rug's originality and appeal.
- Reduces fibre damage: Gentle stain removal avoids unnecessary abrasion.
- Prevents spread: Fast action can stop wine, grease, or muddy water from setting.
- Improves indoor air quality: Older rugs can hold dust and residues alongside the stain itself.
- Extends lifespan: Less residue and fewer harsh chemicals mean less long-term wear.
There's a practical benefit too: you gain confidence. Once you understand the limits of what can be safely done at home, you stop guessing. And guesswork is usually where antique textiles get damaged.
If your rug is part of a wider home refresh, it may also be helpful to look at broader cleaning options like deep cleaning in Notting Hill or, for occasional one-off jobs, one-off cleaning services in Notting Hill. That can be especially useful when the rug stain sits alongside general dust, foot traffic marks, or post-renovation debris.
Who This Is For and When It Makes Sense
This guide is for anyone dealing with a delicate rug and a stain they'd rather not gamble with. That includes collectors, landlords, home movers, interior design lovers, and everyday homeowners who have inherited a rug or picked up a vintage piece while shopping near Portobello. It also makes sense if you're caring for a rug in a room with regular footfall, pets, or the occasional dinner-party mishap.
It makes particular sense when:
- the rug is hand-knotted or hand-woven
- the fibres are wool, silk, cotton, or a mixed antique weave
- the stain is fresh, but you're not sure what caused it
- you've already tried a home remedy and now the mark is larger
- you want to avoid colour loss, shrinkage, or texture changes
It may be safer to stop and consult a specialist if the rug is very old, especially faded, has loose threads, or shows signs of moth damage, old repairs, or dye instability. A small spill on a robust modern rug is one thing. A stain on a 60-year-old or older textile? Different story entirely.
For people comparing services, our services overview gives a broad look at how different cleaning needs are typically handled, while the about us page explains the kind of local, careful approach that matters with delicate fabrics.
Step-by-Step Guidance
Before you begin, take a breath and inspect the stain properly in daylight if you can. Morning light is often best. Artificial lighting can flatter a rug a little too much and hide the true extent of a mark.
1. Identify the stain as best you can
Ask yourself whether it's likely to be water-based, oily, muddy, or dye-related. Mud usually sits on the surface first. Coffee and tea are watery and tannin-based. Grease from food or market snacks clings differently and often looks darker. If you're not sure, treat it as a mixed stain and start with the least aggressive option.
2. Remove loose dirt carefully
Use a soft brush or a vacuum with a gentle setting and an upholstery attachment. Work with the pile, not against it. If the rug has fringe, keep the vacuum away from the ends unless you're using a controlled, low-suction method. No yanking. That never helps, and it can damage the weave faster than the stain does.
3. Blot, don't rub
If the stain is fresh, blot with a white cotton cloth or plain paper towel. Press lightly to lift liquid out. Change to a clean section often. Rubbing can spread the stain and disturb the pile. A little patience here saves a lot later.
4. Test a hidden area
Mix a small amount of mild wool-safe cleaner with water only if the rug can tolerate moisture. Test on the reverse, edge, or another discreet spot. Wait for drying, because dye reactions can appear after a few minutes, not instantly. This bit feels slow, but it is absolutely worth it.
5. Use a controlled cleaning solution
For many antique wool rugs, a very mild pH-neutral solution is the safest starting point. Apply it to the cloth rather than directly onto the rug. Dab gently from the outside of the stain towards the centre, then blot with a dry cloth. If the stain begins lifting, repeat in small cycles rather than flooding the area.
6. Deal with specific stains carefully
Mud: let it dry fully, then lift crumbs and vacuum. Clean the remaining shadow lightly.
Coffee or tea: use minimal moisture and repeat gentle blotting. These stains can leave a tint even after the liquid is gone.
Grease: absorb first with an appropriate dry powder if safe for the rug, then lift residue carefully. Avoid oily household products, which can make things worse.
Wine or juice: act quickly, but not aggressively. Over-wetting can spread colour.
Unknown stain: keep it simple and stop if the rug begins to haze, bleed, or feel stiff.
7. Rinse lightly and blot again
If you used any cleaning solution, follow with the smallest practical amount of clean water on a cloth to remove residue. Then blot dry. Residue left behind can attract more dirt later, which means the stain seems to come back. Annoying, yes. But common.
8. Dry flat with airflow
Lay the rug flat if possible, or prop it safely so air can circulate. Use fans in the room, not direct heat. Avoid radiators, hairdryers, and strong sunlight. Antique fibres can warp or become brittle if dried too quickly.
9. Check for tide marks or colour movement
Once dry, inspect the area carefully. If there's a watermark, a halo, or a colour shift, stop further DIY treatment. That's often the moment to bring in a specialist. Better to pause than to keep fiddling and create a larger problem.
Expert Tips for Better Results
Experienced rug cleaners tend to be cautious in ways that may look almost boring at first. That's usually a good sign.
- Work small: Tackle one patch at a time, not the whole stain in one go.
- Use white cloths: They show transfer clearly and help avoid dye contamination from coloured towels.
- Keep moisture low: Antique rugs often fail because of excess water, not the stain itself.
- Watch the dye: If colour starts moving, stop immediately.
- Mind the backing: A stain on the front may have reached the reverse, especially on older rugs.
- Use neutral products: Strong soaps and alkaline cleaners can alter wool texture.
A useful rule of thumb: if the stain is still improving, continue cautiously. If the rug looks worse after each round, step away. More effort is not always more progress. That's one of those slightly annoying truths, but a real one.
For homes that regularly host guests or see heavy foot traffic, it can also help to schedule periodic maintenance through a spring cleaning service in Notting Hill or a targeted domestic cleaning service so dirt doesn't build up around delicate items in the first place.
Common Mistakes to Avoid
This is where a lot of well-meaning DIY attempts go sideways. Let's keep it honest.
- Scrubbing hard: It frays fibres and spreads the stain.
- Using bleach or harsh stain removers: These can strip dye and weaken the rug.
- Soaking the rug: Too much water can create browning, shrinkage, and backing damage.
- Skipping the test patch: A small hidden test can save the whole rug.
- Applying heat to dry fast: Heat can set stains and distort fibres.
- Mixing cleaning products: That can create unexpected reactions, and not in a good way.
- Ignoring old repairs: Repaired areas are often weaker and need extra care.
One common mistake deserves special mention: using a "miracle" spray because the label sounds reassuring. Rug care is not the place for optimism without evidence. If the product is not clearly safe for wool, silk, or antique textiles, don't improvise.
Tools, Resources and Recommendations
You do not need a suitcase full of gadgets to deal with a stain properly. In most cases, the right small set of tools is enough.
| Tool or Product | Why It Helps | Best Use |
|---|---|---|
| White cotton cloths | Show transfer clearly and avoid dye bleed | Blotting fresh or damp stains |
| Soft brush | Lifts dry soil without harsh abrasion | Pre-cleaning and gentle grooming |
| Vacuum with upholstery attachment | Removes grit safely | Routine care before wet cleaning |
| pH-neutral wool-safe cleaner | Reduces risk to natural fibres | Very light stain treatment |
| Fan for airflow | Helps controlled drying | After any moisture-based cleaning |
If you want a professional approach, choose a service that understands both fabric care and local conditions. In Notting Hill and nearby areas, homeowners often need help with rugs alongside broader fabric and interior cleaning, so a provider familiar with upholstery cleaning in Notting Hill can be helpful when the rug sits in a room with sofas, chairs, and curtains that need coordinated care.
It's also worth checking trust and practical details before booking any cleaning company. Pages such as insurance and safety and health and safety policy can give you a better sense of how seriously a company handles delicate work in the home.
Law, Compliance, Standards, or Best Practice
While there isn't a special law just for antique rug stain removal, best practice matters because you're dealing with a valuable household item, possibly in a rented property, and often with products that should be used safely and according to label instructions. In the UK, common-sense compliance is mostly about careful product use, safe ventilation, and following manufacturer guidance where available.
For professionals, good practice usually includes:
- testing cleaning solutions before use
- using suitable PPE where needed
- avoiding unsafe chemical mixing
- documenting any pre-existing wear or dye instability
- working in a way that does not damage furnishings, flooring, or the rug itself
If you're using a service provider, you should expect clear communication about what can and cannot be treated safely. That includes honest advice if a stain is likely permanent. A careful cleaner will usually say so rather than overpromise. Not glamorous, but reassuring.
For more on service expectations, pricing clarity, and what to ask before booking, see pricing and quotes and the request a quote page.

Options, Methods, or Comparison Table
Different stain-removal approaches suit different situations. Here's a practical comparison to help you decide what makes sense.
| Method | Good For | Risk Level | Best When |
|---|---|---|---|
| Dry blotting | Fresh spills, surface moisture | Low | You catch the stain immediately |
| Light solution cleaning | Minor food or drink stains | Moderate | The rug is colourfast and stable |
| Dry absorbent treatment | Grease or oily marks | Moderate | The rug tolerates dry powder and gentle lifting |
| Professional rug cleaning | Old stains, unknown fibres, valuable rugs | Lowest risk to the rug, highest cost | You want the safest route |
To be fair, the "best" option is often the one that causes the least change to the rug. If the mark is small and fresh, at-home action may be enough. If the rug has complex dyes, an unusual weave, or a stain that has already set, professional help is usually the smart choice. A lot of people wait too long. Then the stain becomes a project.
Case Study or Real-World Example
A homeowner in Notting Hill noticed a brownish mark on an antique wool rug after a Saturday visit to Portobello. It turned out to be a mix of damp street mud and a little coffee from a takeaway cup. The first instinct was to rub it with a kitchen sponge. Fortunately, they stopped after only a few seconds, because the fibres started to flatten and the mark spread outward.
Instead, the rug was allowed to dry slightly, loose grit was vacuumed away with care, and a hidden spot was tested for dye stability. The stain was then treated with minimal moisture using a white cloth and a very mild wool-safe cleaner. The mark reduced, but not fully. At that point, the owner decided not to keep pushing it at home. Sensible move.
The final professional treatment focused on residue removal, controlled drying, and inspection for any browning. The rug kept its colour, and the stain faded to a much less visible trace. Not invisible. Rugs are honest like that. But it no longer drew the eye the moment you walked into the room.
This kind of outcome is common: a careful first response makes professional restoration more effective later. The big lesson? Early restraint often beats late enthusiasm.
Practical Checklist
Use this quick checklist before you attempt any stain removal on an antique rug.
- Identify the likely stain type
- Check the rug for loose threads, weak edges, or previous repairs
- Vacuum or brush away dry dirt first
- Test any cleaner on a hidden area
- Use a white cloth and blot gently
- Keep moisture to a minimum
- Avoid scrubbing, soaking, or heat
- Dry flat with airflow
- Inspect for dye bleed, tide marks, or texture change
- Stop and seek help if the stain worsens
If the rug is particularly valuable or you simply want certainty, it may be worth speaking with a local cleaner who understands delicate fibres and can advise on the safest route. Our contact page is the quickest way to ask a question, and if you already know you want help, you can also request a quote directly.
Conclusion
Learning how to remove Portobello Market stains from antique rugs is really about balance: act quickly, but gently; clean enough to remove the mark, but not so much that you damage the rug in the process. The safest results usually come from patience, testing, and knowing when the job has crossed from routine care into specialist territory.
Antique rugs deserve a calm hand. If you treat them that way, they often reward you by staying beautiful for much longer than you'd expect. And that's the lovely thing about these pieces: they carry stories, not just stains.
Get a free quote today and see how much you can save.
When the rug matters, careful action matters too. If you're unsure, ask before you improvise - it's the simplest way to protect something worth keeping.


